Finishing and Painting 3D Wooden Camper Van Models: A Maker's Guide
Learn how to finish and paint a 3D wooden camper van model. Tips on sanding, priming, painting, and sealing for a polished retro look.
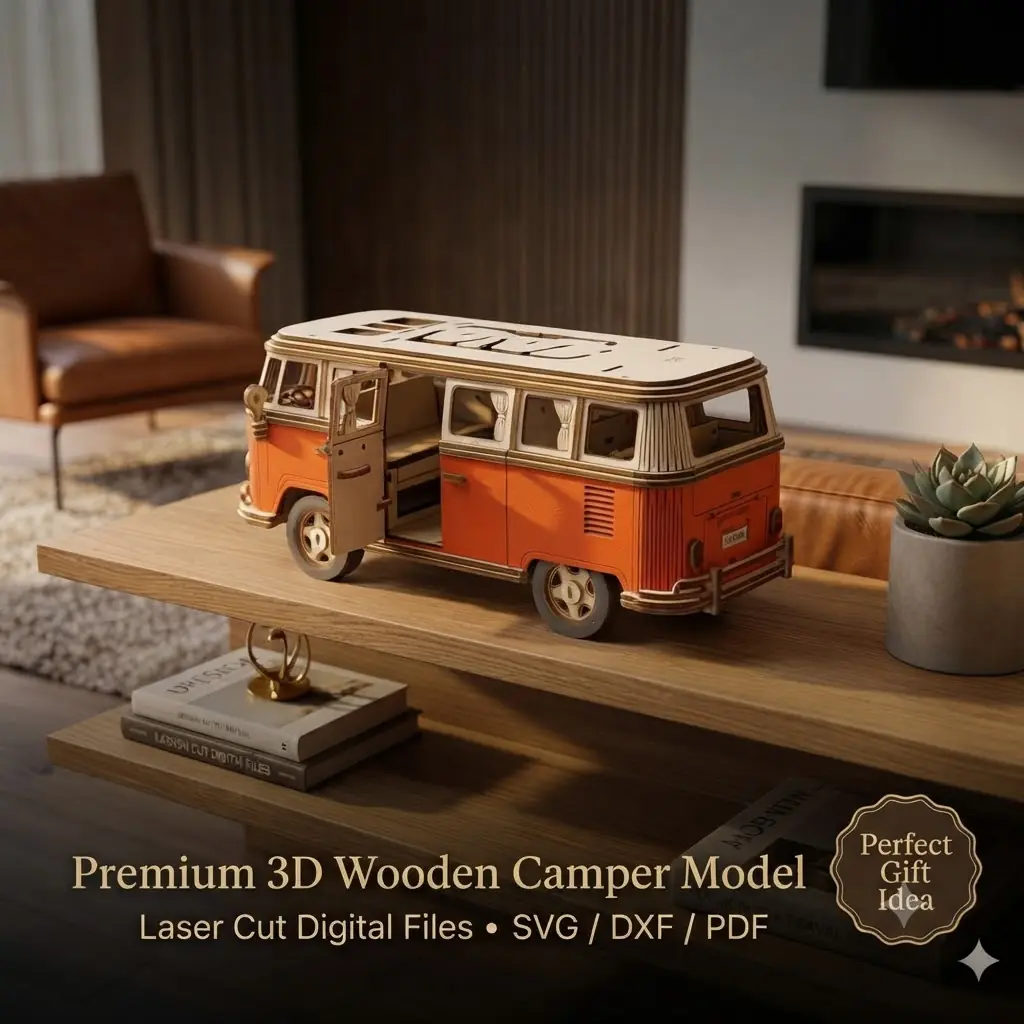
A freshly cut 3D wooden camper van model is a satisfying sight. The interlocking parts fit together, the retro silhouette is unmistakable, and you can already picture it on a shelf. But the raw plywood surface often looks unfinished. A little sanding, priming, painting, and sealing can transform that bare wood into a polished keepsake that shows off your craftsmanship.
This guide walks through the finishing process for a 3D wooden camper van model, from preparing the wood to applying the final protective coat. Whether you’re making one for your own desk or as a gift, these steps help you achieve a clean, durable result.
Why Finish a 3D Wooden Model?
Laser-cut plywood has a natural charm, but it also has a few drawbacks. The cut edges can be darkened by the laser, and the surface may have slight scorch marks or a rough texture. A finish addresses these issues and adds protection.
A clear coat or paint can:
- Hide laser scorch marks – A coat of paint or a dark stain can cover the charred edges.
- Protect the wood – Sealing helps prevent moisture damage and dust buildup.
- Enhance the design – Color can highlight the retro details of the camper van, making it pop.
- Make it more durable – A sealed model is less likely to chip or scratch.
Even if you prefer a natural wood look, a clear finish is still a good idea. It brings out the grain and gives the model a more finished appearance.
Preparing the Wood for Finishing
Before you reach for paint or sealer, take a few minutes to prepare the surface. Proper prep makes a big difference in the final result.
Sanding
Lightly sand the flat surfaces of the plywood with fine-grit sandpaper, around 220 grit. This smooths out any rough spots and helps the finish adhere better. Be gentle – you don’t want to remove too much material, especially on thin parts.
For the cut edges, you can use a small sanding stick or a folded piece of sandpaper. The edges may be slightly rough from the laser, but they don’t need to be perfectly smooth. Just remove any loose fibers or major char.
Cleaning
After sanding, wipe the pieces with a tack cloth or a soft, lint-free cloth to remove dust. If there’s a lot of residue, you can use a slightly damp cloth, but let the wood dry completely before finishing.
Priming (Optional but Recommended)
If you plan to paint the model, a primer helps the paint stick and provides a uniform base. Use a spray primer designed for wood, and apply it in thin, even coats. Let it dry completely before sanding lightly again with fine grit to smooth any raised grain.
Priming is especially helpful if you’re using light colors over dark plywood, as it prevents the wood tone from bleeding through.
Choosing the Right Paint
For a 3D wooden model, you have several paint options. Each has its own pros and cons.
Acrylic Paint
Acrylic craft paint is a popular choice for small models. It’s water-based, easy to work with, and comes in a wide range of colors. You can apply it with a brush or a small foam brush. Acrylic dries quickly and cleans up with water.
One downside is that brush strokes may show, especially on large flat areas. To minimize this, use thin coats and a high-quality brush, or consider using a spray paint for a smoother finish.
Spray Paint
Spray paint gives a smooth, even coat without brush marks. It’s great for covering large areas quickly. Use a primer first, then apply several light coats of spray paint, allowing each to dry. Work in a well-ventilated area and protect your work surface.
Spray paint can be harder to control on small parts, so you might want to mask off areas you don’t want painted.
Wood Stain
If you prefer a natural look, wood stain can enhance the grain while adding color. Stains come in various shades, from light honey to dark walnut. Apply with a cloth or brush, let it sit for a few minutes, then wipe off the excess. The longer you leave it, the darker the color.
Stain doesn’t provide much protection on its own, so you’ll still need a clear sealer.
Painting Techniques for a Clean Finish
Painting a 3D model with interlocking parts can be tricky. Here are some tips to get a professional-looking result.
Paint Before Assembly
It’s usually easier to paint the individual pieces before assembling the model. This way, you can reach all the surfaces without struggling to paint around joints. Just be careful not to get paint on the tabs and slots that need to fit together – a tight fit may be compromised if the paint adds thickness.
If you do paint before assembly, you may need to lightly sand the tabs or use a small file to ensure a snug fit.
Use Thin Coats
Thick paint can obscure fine details and cause drips. Apply thin, even coats, and let each one dry completely before adding another. Two or three thin coats are better than one thick coat.
Masking for Two-Tone Designs
If you want to paint the camper van in two colors – say, a cream body with a teal roof – use painter’s tape to mask off the areas you don’t want painted. Apply the tape carefully, press down the edges, and paint. Remove the tape while the paint is still slightly wet to avoid peeling.
Adding Details
For small details like windows, stripes, or a license plate, use a fine brush and steady hand. You can also use paint pens or markers for precise lines. If you make a mistake, you can often wipe it off with a damp cloth if the paint is still wet, or sand it lightly once dry.
Sealing and Protecting the Model
Once the paint is dry, a clear sealer protects the finish and gives it a nice sheen. You can use a clear spray sealer or a brush-on polyurethane.
Clear Spray Sealer
A clear acrylic spray is easy to apply and dries quickly. Use it in a well-ventilated area, and apply several light coats. This is a good option for a matte or satin finish.
Polyurethane
Polyurethane is more durable and comes in water-based or oil-based formulas. Water-based polyurethane is low-odor and cleans up with water. Apply with a brush in thin coats, sanding lightly between coats for a smooth finish.
Wax
For a subtle, hand-rubbed look, you can use a furniture wax. Apply with a soft cloth, let it dry, then buff to a shine. Wax is not as durable as polyurethane but is easy to reapply.
Assembling the Model After Finishing
If you painted the pieces before assembly, you’ll need to fit them together carefully. The paint may make the joints tighter, so test-fit each piece before applying glue. If a joint is too tight, sand the tab slightly.
Use a wood glue that dries clear, and apply a small amount to the tabs and slots. Press the pieces together and hold for a few seconds. Wipe away any excess glue with a damp cloth.
Once assembled, you can touch up any exposed edges with a small brush and the same paint.
Displaying Your Finished Camper Van
A finished camper van model makes a charming display piece. Place it on a shelf, mantel, or desk. You can also add a small LED light inside for a cozy glow, but that’s a separate project.
If you’re giving it as a gift, consider a simple wooden base or a small display case. The retro design is sure to be a conversation starter.
Troubleshooting Common Finishing Issues
Even with careful prep, you might run into a few problems. Here are some common issues and how to fix them.
Paint Bubbles or Blisters
This can happen if the wood wasn’t clean or if the paint was applied too thick. Sand the affected area, clean it, and repaint with thinner coats.
Brush Strokes
To reduce brush strokes, use a foam brush or a spray paint. You can also sand lightly between coats with fine grit to smooth the surface.
Paint Not Sticking
If the paint beads up or doesn’t adhere, the wood may have too much residue or oil. Sand the surface, clean with a degreaser, and apply a primer.
Uneven Color
This can happen if the wood absorbs paint unevenly. A primer helps, and you may need multiple coats. Sanding between coats also helps even out the finish.
Final Thoughts
Finishing a 3D wooden camper van model is a rewarding step that turns a simple laser-cut project into a polished piece. With a little patience and the right techniques, you can achieve a professional-looking result that you’ll be proud to display or gift.
Remember, the key is to prepare the wood well, use thin coats, and seal the finish. Whether you go for a classic retro paint job or a natural wood look, the effort is worth it.
If you’re looking for a camper van model to practice on, the 3D Wooden Camper Van Laser Cut Files from LaserNest include SVG, DXF, and PDF formats, ready for your laser cutter. Happy making!