Hanging and Loading a Layered Dog Key Holder: Placement and Hardware Tips
Learn how to choose a spot, mount, and load a layered wooden dog key holder so keys and leashes stay organized and the piece holds up over time.
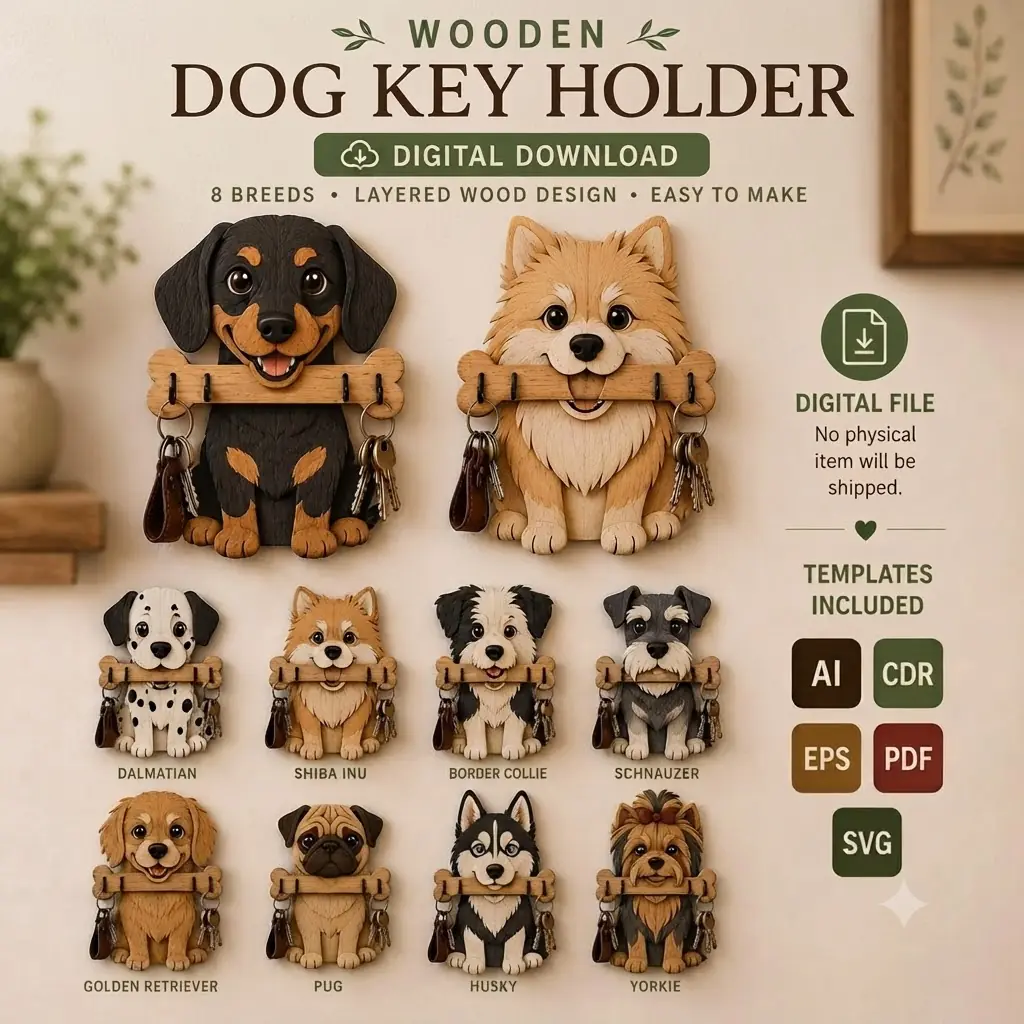
A layered wooden dog key holder earns its place in a home when it actually works: keys go on, the leash comes off, and nothing ends up in a pile on the floor. The design and cutting get a lot of attention, but the part that decides whether the piece becomes a daily habit is how you hang it and how you load it. This guide walks through placement, mounting, and loading decisions for a layered pet key holder so the finished piece stays useful and looks good doing it.
This is general maker guidance, not a set of universal rules. Wall materials, hardware, and household habits vary, so treat each suggestion as a starting point you can adapt to your own space and to the specific file you are cutting.
Choosing the Right Spot Before You Drill
The best location is usually the one you already walk past with your hands full. For most homes that means near the door you use most, but the exact spot matters more than the room.
Start by watching your own routine for a day or two. Where do keys currently land? Where does the leash get dropped? If the answer is a kitchen counter, a holder mounted across the house will not fix the habit. Put the piece where the clutter already happens.
A few practical checks before you commit to a wall:
- Reach height. The hooks should sit where an adult can hang and grab keys without stretching or bending. This is a comfort judgment, not a fixed measurement.
- Door swing and traffic. Avoid spots where an open door, a swinging bag, or a shoulder could catch the piece.
- Moisture and heat. Bathrooms, above radiators, and directly over stoves are poor choices for wood decor.
- Light. A spot with decent light makes the layered design readable and helps you find the right key fast.
- Backing material. Drywall, plaster, brick, and wood each need different anchors. Know what is behind the surface before you plan the mount.
If the holder is going in a rental or a space where you would rather not drill, consider whether a removable adhesive system rated for the weight is appropriate. Follow the manufacturer’s instructions for surface prep and cure time, and be realistic about how much a hook will be pulled on.
Mounting a Layered Wooden Holder Securely
A key holder takes repeated downward and outward force every time someone grabs a leash. That is a harder job than hanging a picture, so plan the mount for the load it will actually carry.
Understand the load
Keys are light, but a retractable leash, a bundle of tags, or a heavy carabiner adds up. Think about the heaviest thing that will hang on the piece on a normal day, then add margin. If you are unsure whether a wall or anchor can take the load, ask someone qualified rather than guessing.
Choose hardware that matches the wall
Use anchors designed for your wall type and rated for more than you expect to hang. For studs and solid wood, screws alone are often enough. For hollow drywall, use appropriate anchors and follow their installation instructions. For brick or stone, masonry fasteners are the usual choice.
Protect the wood
Layered wood pieces can crack or crush if a screw is overtightened. A small washer under the screw head spreads the pressure. If the design has a dedicated hanging hole or keyhole slot, use it as intended rather than drilling new holes that could split a layer.
Level and mark before drilling
Hold the piece in place, check it with a level, and mark the mounting points with a pencil. Measure twice. Once a hole is in the wall, adjusting is more work than getting it right the first time.
Consider a French cleat or backing board
For a larger or heavier layered piece, a cleat or a thin backing board can distribute the load across more of the wall and make removal easier. This is a design decision you can make before cutting if you plan for it in the file.
Loading Keys and Leashes Without Stressing the Piece
How you load the holder affects both how long it lasts and how pleasant it is to use.
- Spread the weight. Hang keys across the available hooks rather than piling everything on one. Balanced loading reduces strain on the mount and the wood.
- Keep the heaviest item low or centered. A heavy leash hanging off one edge creates a lever effect. If the design allows, put the heaviest item near the center of the mount.
- Use the right hook for the job. Small keys on small hooks, leashes on sturdier ones. If a hook feels like it is flexing, it is carrying too much.
- Avoid sharp metal edges. A rough carabiner or a key ring with a burr can wear a groove into wood over time. A light sanding of the hook edges before assembly helps.
- Do not overload for convenience. It is tempting to hang bags, lanyards, and dog tags all on one piece. A key holder is not a coat rack. Keep it to what it was designed for.
A simple habit helps: when you come in, hang the leash first and the keys second. That order keeps the heavier item from swinging into the lighter ones.
Keeping the Piece Looking Good Over Time
Wood decor in an entryway collects dust, fingerprints, and the occasional wet leash. A few small habits keep it presentable.
Dust the layered surfaces with a soft cloth rather than a wet rag, since moisture can raise grain and dull a finish. If the piece has a protective topcoat, follow the product’s care guidance. Wipe down hooks after a rainy walk so water does not sit against the wood.
Check the mount every few months. Tighten screws that have worked loose, and replace any anchor that shows signs of pulling out. A quick visual check takes seconds and prevents a surprise.
If the finish starts to look tired, a light refresh is usually enough. Sanding and refinishing layered pieces is covered in more depth in our guide to finishing laser-cut animal napkin holders, and the same principles of light sanding and thin coats apply here.
When a Product File Fits This Kind of Project
If you would rather start from a prepared design than draw your own, the LaserNest 3D Dog Key Holder Laser Cut Bundle is a layered pet leash and key hanger design offered as SVG, DXF, CDR, and PDF files. Those formats cover a range of common laser software workflows, though you should confirm your own software and machine handle the format you plan to use before cutting. The bundle is a digital download; nothing physical ships, and all purchases go through the Etsy shop.
A prepared file can save design time, but it does not remove the need to test on your own material and confirm the mount works for your wall. Treat the file as a starting point and adapt the hanging method to your space.
A Short Checklist Before You Hang It
- Confirm the wall type and choose anchors rated for the load.
- Mark and level the mounting points before drilling.
- Use washers or a backing board to protect layered wood.
- Load the heaviest item near the center and spread the rest.
- Check the mount every few months and tighten as needed.
A layered dog key holder is a small piece of home organization, but the difference between a decoration and a daily tool comes down to placement and mounting. Get those right, and the piece earns its spot by the door.
For more on building and personalizing this kind of project, see our guides to making personalized dog key holders and planning a layered dog key holder laser project. If you are ready to cut, browse the LaserNest Etsy shop for the 3D Dog Key Holder Laser Cut Bundle and other layered home decor files.