How to Make a Personalized Dog Key Holder with Your Laser Cutter
Learn to design and assemble a layered wooden dog key holder. Tips on personalization, material choice, and finishing for a useful gift or home organizer.
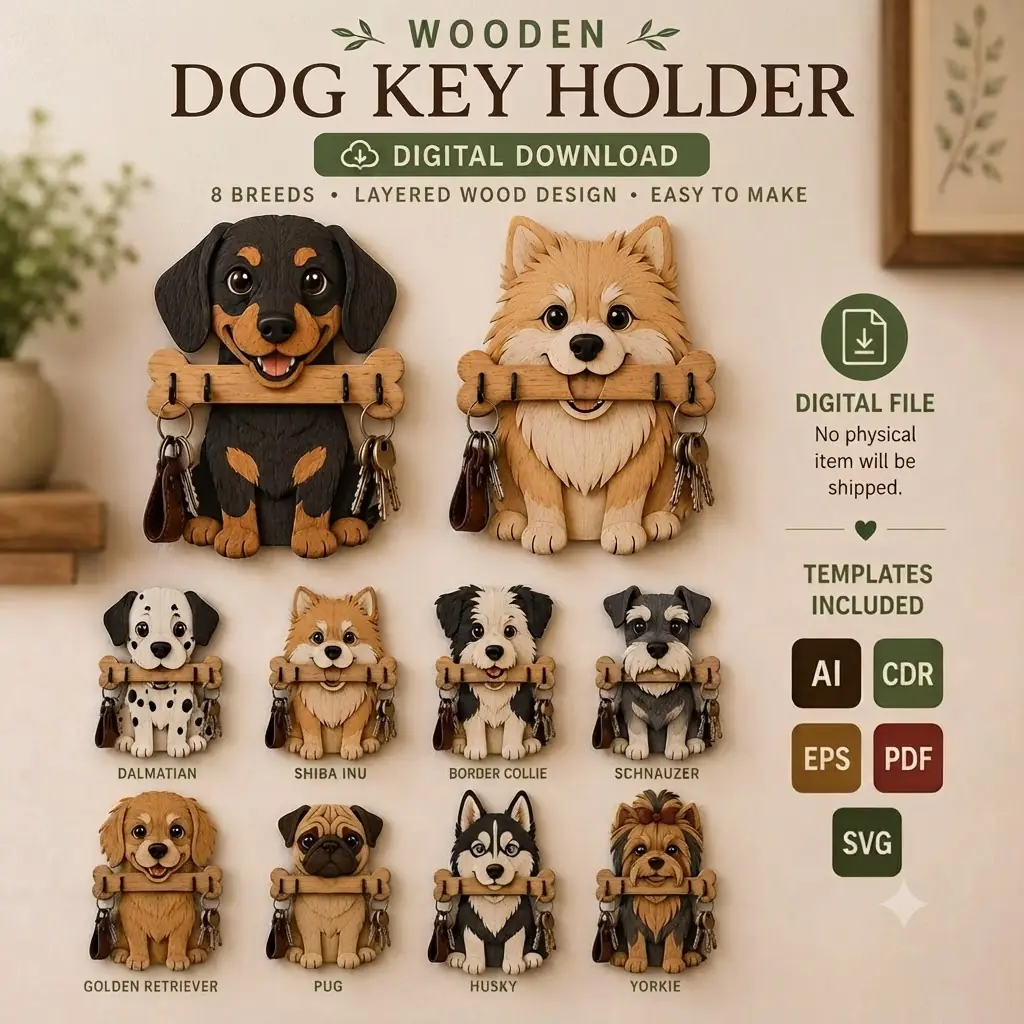
If you love your dog and enjoy creating with your laser cutter, a personalized dog key holder is a natural project. It keeps leashes, collars, and keys organized while adding a custom touch to your entryway. This project is ideal for makers of all skill levels—from beginners experimenting with layered designs to seasoned crafters looking to add a bestseller to their shop. By the end of this article, you’ll know how to plan, cut, assemble, and finish a durable, attractive key holder that makes a great gift or small-batch product.
Understanding the Layered Design
A layered key holder typically consists of several flat pieces that stack to create depth and dimension. For a dog-themed holder, you might have a backplate, a silhouette of a dog, and optional decorative elements such as a name or paw prints. The layers are cut from wood or acrylic and then glued together. The result is a 3D effect that stands out on the wall, almost like a miniature shadow box.
When planning your design, consider the thickness of each layer. Select material thicknesses that suit your design—thinner layers for details, thicker for structural parts. You can mix thicknesses to create visual depth. One of the advantages of working with a ready-made digital design bundle is that the layers are already carefully arranged for you. You get multiple file formats—SVG, DXF, CDR, and PDF—so you can open them in your preferred software, make adjustments, and start cutting quickly. This saves time and lets you focus on personalization and finishing.
Choosing Materials and Settings
Wood is the most popular choice for key holders because it’s easy to cut, sand, and finish. Plywood, MDF, and hardwood veneers all work well. For a more modern look, acrylic or colored cast acrylic can be used. Always test your material with a small cut to dial in power and speed settings for your specific machine. Every laser behaves a little differently, and even the same model can vary based on tube age and optics. A test grid on scrap material helps you find the sweet spot.
If you plan to paint or stain the layers, consider using raw wood that accepts finishes well. Baltic birch plywood has a smooth surface and minimal voids, making it ideal for painting. For a natural look, apply a clear coat or wax to protect the wood. MDF takes paint beautifully but can create more charring, so good ventilation and cleaning are important. Acrylic offers a glossy, modern finish and comes in many colors, but edge polishing may be necessary for a professional look.
Personalizing Your Key Holder
Personalization is what turns a generic key holder into a cherished gift. You can add a dog’s name, a favorite quote, or even a small portrait silhouette. The file formats included—SVG, DXF, CDR, and PDF—are all editable, allowing you to tweak text and shapes before cutting. Use vector editing software like Inkscape, Adobe Illustrator, or even LightBurn’s built-in tools to adjust the font, size, and placement.
When adding text, design it large enough to remain sturdy after cutting. Very fine letters may burn away or become fragile. Also, consider the kerf—the width of the laser beam—when designing tight-fitting slots or text. A slight offset can help parts fit together snugly. If you’re making a key holder as a gift, ask the recipient for their dog’s name and perhaps a favorite color. That small detail makes the item feel truly one-of-a-kind.
Assembly and Finishing
After cutting, remove any char or residue from the edges. Light sanding with fine-grit sandpaper smooths the surfaces and prepares them for glue. Use wood glue or cyanoacrylate (CA) glue for strong bonds. Apply glue evenly and clamp the layers together until dry. Wipe away excess glue with a damp cloth. For intricate layers, you might find it helpful to dry-fit the pieces first to check alignment.
For the hooks, use appropriate hooks for leashes and keys. Pre-drill pilot holes to prevent splitting. Mount the hooks on the backplate or through a designated layer. If you plan to hang the key holder, attach appropriate hanging hardware to the back. Consider the total weight—especially if you’ll hang multiple sets of keys or heavy leashes—and choose wall anchors suited to your wall type.
Finishing options include painting, staining, or sealing. If you painted individual layers before assembly, touch up any exposed edges. A final coat of clear polyurethane or spray sealer protects the wood from moisture and daily use. For a smooth, furniture-grade finish, you can apply a sanding sealer before painting, then lightly sand between coats. This extra step elevates the look and feel of your finished piece.
Display and Everyday Use
Once your key holder is ready, think about where it will live. Entryways, mudrooms, or near the garage door are all practical spots. Pair it with a small shelf or a separate hook rack for dog leashes. Some makers even add a small whiteboard or chalkboard area to the backplate for reminders