Personalizing Welcome Signs for Home and Gifts
Learn how to customize laser-cut welcome signs for farmhouse decor, housewarming gifts, and small business sales with simple design tips.
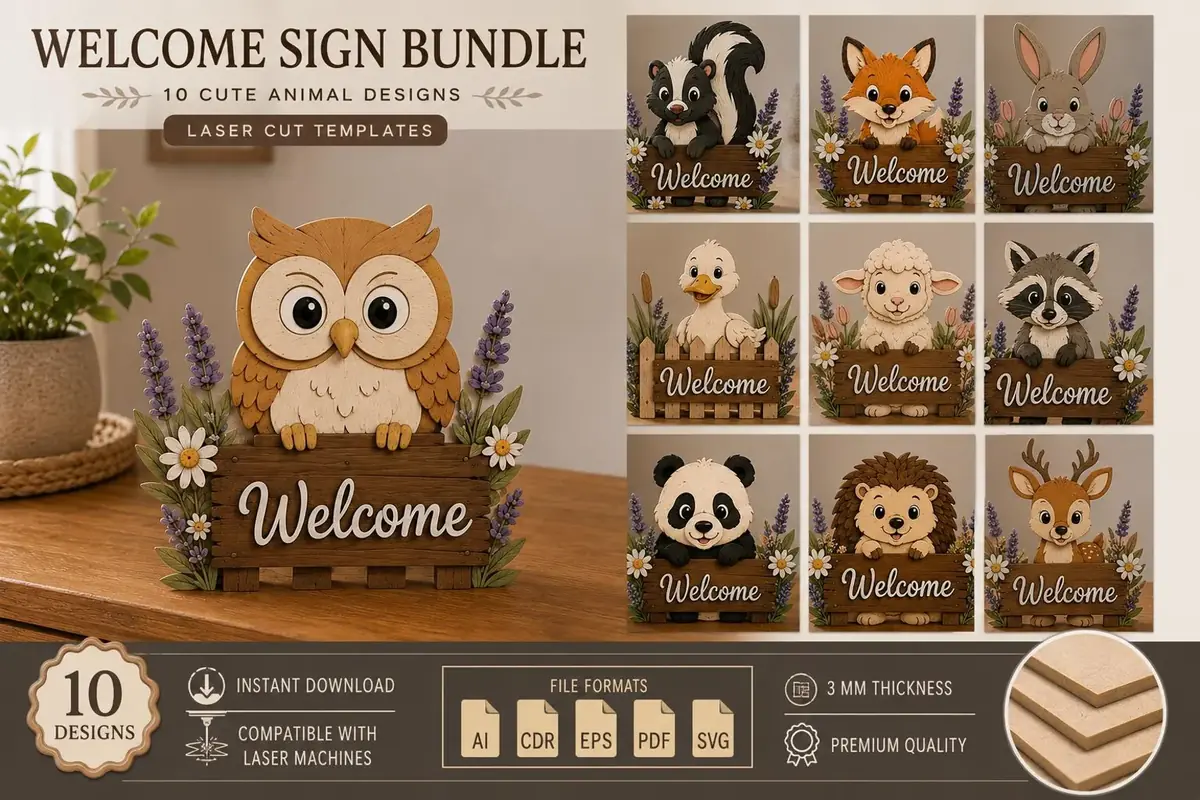
Choosing a Design That Works for Personalization
A versatile welcome sign design makes it easy to swap out names, colors, or decorative accents. The Welcome Sign Collection from LaserNestDesignsArt includes digital templates in SVG, DXF, CDR, and PDF formats, so you can open and edit them in any common vector software. When preparing your file, organize individual elements—background, lettering, flourishes—on separate layers. This lets you change just the text while keeping the rest of the layout intact, or rearrange decorative elements to suit a specific theme.
Consider the final style you want. Farmhouse-inspired signs often combine bold serif or script lettering with organic shapes like wreaths, leaves, or simple geometric borders. If the design already separates text and decorations onto distinct layers, personalizing becomes a matter of selecting a new typeface or adding a family initial. For more advanced edits, you can import additional clipart, resize components, or even combine two templates to create a hybrid design. Always save a copy of the original file before making changes, so you can start fresh if needed.
Material Selection for Different Looks
The material you choose greatly influences the sign’s character and durability. Baltic birch plywood is a reliable choice for laser cutting because it produces crisp edges and has a uniform surface that accepts paint or stain evenly. Its light color provides a neutral base for both bright paints and natural wood tones. MDF (medium-density fiberboard) offers a smooth, consistent finish ideal for painted signs, but it is heavier and may require extra care when mounting. For a more contemporary look, consider using acrylic for the top layer—clear acrylic can be back-painted or left translucent, giving the piece a modern, luminous quality. Hardwood veneers such as walnut, cherry, or oak add a premium touch and are perfect for small accent layers or single-layer signs where the wood grain becomes the star.
When selecting materials, think about where the sign will hang. Indoor signs can use lighter materials and delicate finishes, while outdoor signs benefit from more weather-resistant options like exterior-grade plywood or sealed MDF. Always run a test cut on a scrap piece to fine-tune your laser settings—power, speed, and number of passes vary with material thickness and density.
Adding Personal Touches
Customization goes well beyond changing a name. Here are a few ways to add personality:
- Color variety: Paint each layer a different shade to create depth. A classic farmhouse palette might combine creamy whites, soft grays, and muted green or navy accents. For a rustic look, stain the wood and leave the lettering natural, then sand edges lightly for a distressed effect.
- Play with text placement: Move “Welcome” to the top or bottom, curve it along a decorative arc, or replace it with a family motto. Just be mindful of font size—tiny details may not cut cleanly or remain readable.
- Add dimensional details: Glue small cutout shapes like hearts, stars, or seasonal motifs between the layers. These can be painted in contrasting colors to pop against the background.
- Incorporate a backer board: Mount the layered sign onto a larger board in a different finish. The extended border not only frames the design but also provides a sturdy surface for attaching hanging hardware.
- Try alternative mounting ideas: For small signs, glue a magnet on the back for refrigerator display, or add an easel back for shelf standing. For a truly personal gift, laser-engrave a short message or coordinates on the back.
Assembly Tips for a Professional Finish
Layered signs demand precise assembly to ensure all pieces line up correctly. Before glue-up, dry-fit the layers and align them carefully. A homemade jig—simply a few scrap wood blocks taped or clamped to your work surface—can hold pieces in place while the adhesive sets. Choose a glue that dries clear and allows a short open time so you can adjust positioning. Apply adhesive sparingly with a toothpick or fine-tip bottle to avoid squeeze-out, which can mar the finished look.
For designs with many small, intricate pieces, work in stages. Glue the most complex layer first, let it dry, then add subsequent layers. If your design includes a hanging system, think about it during assembly. Keyhole slots routed into the back layer provide a secure, flush fit against the wall. Sawtooth hangers are a quick alternative for lightweight signs. For heavier pieces, a French cleat system offers robust support and keeps the sign level.
Display and Care
Where you display the sign influences how you finish it. Indoor signs hung in a foyer or living room can be finished with a simple clear coat to protect against dust. For covered outdoor areas like a porch, apply several coats of exterior-grade polyurethane to guard against humidity and temperature swings. Avoid hanging unsealed wood or MDF in fully exposed outdoor locations, as moisture will quickly cause swelling or warping.
To keep your sign looking fresh, dust it regularly with a soft cloth. If it becomes dirty, gently wipe with a barely damp cloth and dry immediately. A well-made wooden sign can last for years with minimal care.
Gifting and Selling Ideas
Personalized welcome signs are ideal gifts for many occasions:
- Housewarmings: A sign featuring the family name or new address adds instant warmth.
- Weddings: Include the couple’s last name and ceremony date for a memorable keepsake.
- Holidays: Create seasonal versions with “Merry Christmas,” “Happy Fall,” or “Hello Spring” that can be displayed year after year.
- Baby showers: Celebrate a new arrival with a nursery door sign bearing the baby’s name.
For small business owners, welcome signs can be a profitable craft fair staple or an Etsy bestseller. When selling finished signs, photograph them in natural light against a neutral background to highlight the layers and colors. Include a few styled shots—a sign on an actual door, on a mantel, or surrounded by coordinating decor. If you offer customization, clearly list the options in your product description and note any limitations (such as character count or font styles). Providing a care card with each purchase reassures buyers about durability.
If you prefer to sell digital files, package the templates with clear instructions and recommend material thicknesses (without specifying exact numbers—simply suggest “thin plywood” or “medium MDF”). Highlight that the files are compatible with popular laser software, and include a link to your store’s policy on file usage.
Conclusion
A personalized welcome sign does more than decorate an entryway—it tells a story. With a flexible design file, a thoughtful choice of materials, and a few creative customizations, you can craft a piece that feels both personal and professional. Whether it hangs on your own front door or becomes a meaningful gift for someone else, the time you spend personalizing the sign turns a simple template into a cherished item. The process is satisfying, and the result welcomes everyone who crosses the threshold.