How to Plan a Laser-Cut Vintage Truck Bottle Carrier
Learn how to evaluate and prepare a laser-cut wooden truck bottle carrier project, from material selection to assembly planning.
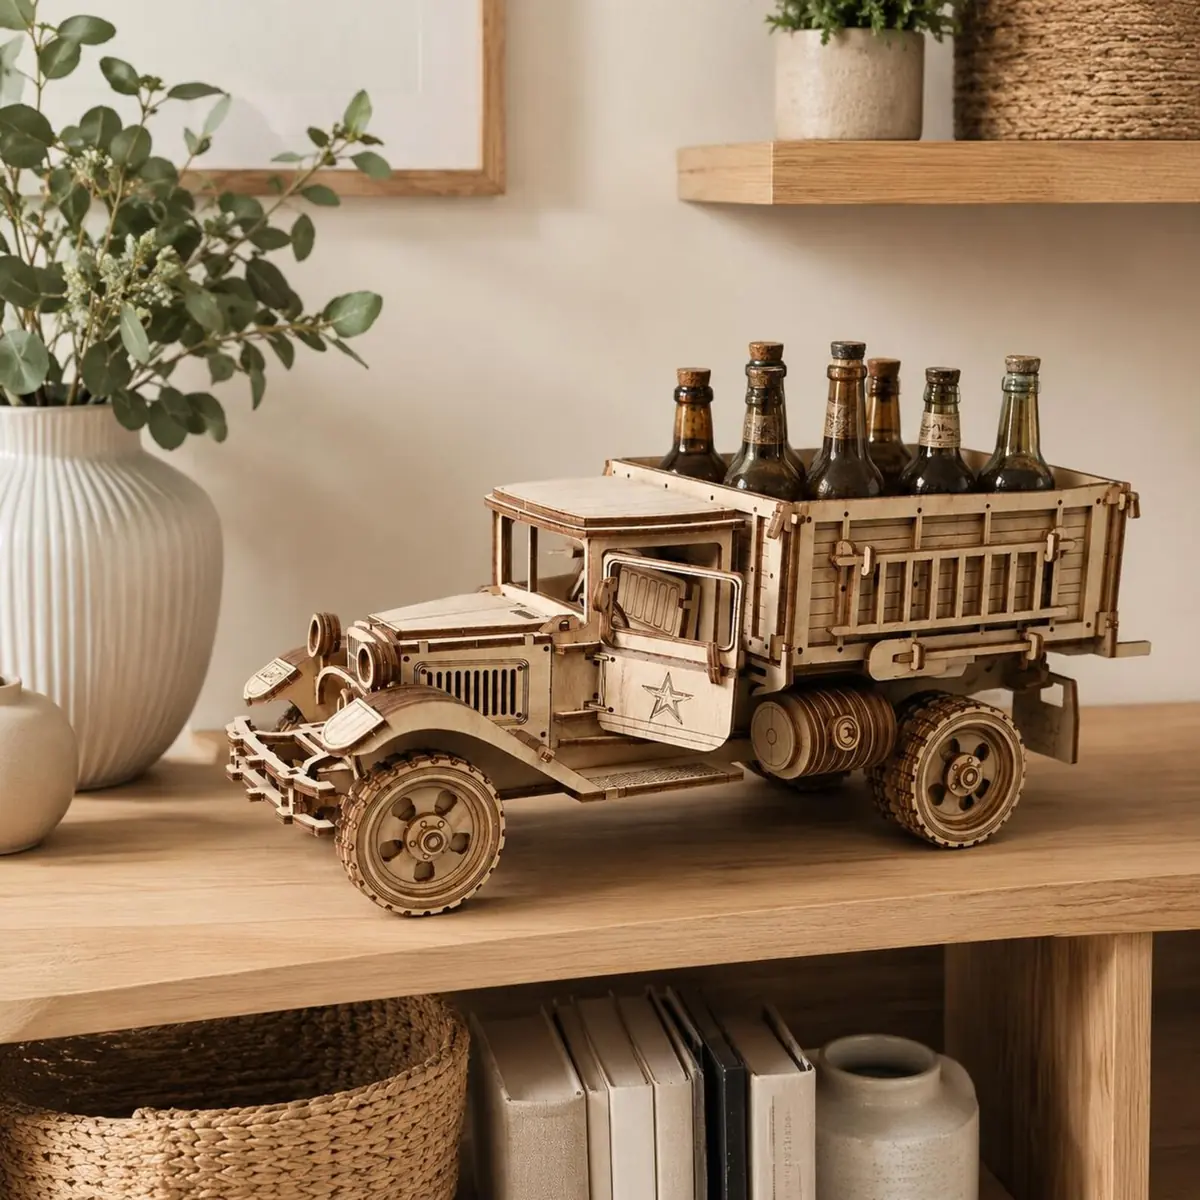
Planning a laser-cut project before you open the design file can save time, material, and frustration. This is especially true for multi-part 3D models like a wooden truck bottle carrier. Whether you are new to laser cutting or have some experience, taking a few minutes to evaluate the design, choose materials, and plan your workflow will help you achieve a clean, sturdy result. In this guide, we’ll walk through the key steps to prepare for a successful build.
Understanding the Design
A wooden truck bottle carrier is a 3D model designed to hold six bottles. The design is inspired by vintage trucks, and you can expect multiple parts that form the body, wheels, and bottle compartments. Before you cut, it helps to review the file in your preferred software—such as LightBurn or Inkscape—to understand how the pieces fit together. Look for any notes or assembly diagrams that might be included with the purchase. Many laser-cut 3D models use tabs and slots for assembly. Identify these features to determine where parts join. Some designs use friction-fit joints that hold without glue, while others may require adhesive. Checking the file also allows you to plan the cutting order: cutting intricate interior cuts before the outer perimeter can prevent parts from shifting during the process. If you’re new to laser cutting, take time to learn how to navigate layers and assign operations like cut, score, or engrave. This upfront investment pays off when you avoid miscuts on expensive materials.
Choosing the Right Material
Material choice affects both the look and durability of your project. For a bottle carrier that will hold weight, you want a sturdy wood that cuts cleanly and resists warping. Common options include birch plywood, MDF, or hardwood veneers. Birch plywood is popular for its strength and fine grain, while MDF offers a smooth, consistent surface ideal for painting. Avoid solid wood planks that may have knots or uneven density. Thickness is critical: many laser-cut designs are engineered for a specific material thickness. Using a different thickness can cause joints to be too loose or too tight. If you must substitute, test first on scrap. A good practice is to purchase a material sample pack and run a small test cut to verify fit. Also consider the kerf—the width of the laser cut—which can affect how parts mate. Some software allows kerf compensation; if not, you may need to adjust the design or accept a slightly looser fit and use glue. If you plan to use the carrier for actual bottles, choose a material that can handle weight and occasional moisture. Seal the wood appropriately after assembly.
Preparing Your Laser Cutter
Once you have your material and design file, prepare your laser cutter. A clean, well-maintained machine yields the best results. Start by cleaning the lens and mirrors according to your manufacturer’s instructions. Check that the bed is level and free of debris. Focus the laser to the top of your material; improper focus leads to charred edges or incomplete cuts. Settings depend on your specific machine, material type, and thickness—always run a test cut on a scrap piece first. Many makers create a small test grid with varying speed and power settings to dial in the optimal combination. The design file may include separate layers for cutting and engraving; make sure your software assigns the correct operations to each. When arranging parts on the work area, minimize waste but also consider the order of cuts. Small pieces like wheels might shift if cut early; some prefer to cut all parts in one pass with masking tape to hold them, while others cut larger pieces first. Use a honeycomb bed or pin bed to support the material and allow smoke to escape, reducing backside scorching. Air assist, if available, helps achieve cleaner cuts and reduces flame-ups.
Assembly Planning
After cutting, carefully remove the pieces from the machine. Lay them out and identify each part using the design preview or any included documentation. For a truck bottle carrier, assembly typically starts with the main body—the cab and flatbed—then proceeds to the wheels and any ornamental details. Work on a flat, clean surface. Test-fit joints without glue to understand the assembly sequence and check for alignment. Interlocking tabs should fit snugly; if they are too tight, gently sand the tab edges. If they are too loose, a small amount of wood glue or cyanoacrylate adhesive can fill the gap. Use clamps or painter’s tape to hold assemblies while the glue sets. Be patient: rushing can lead to misaligned parts and a lopsided carrier. For tricky areas, refer back to the design file or any photos. Some makers take a photo of the laid-out pieces before assembly for reference. If the design includes moving parts like wheels, ensure they rotate freely without binding. Applying a tiny drop of lubricant or wax can help if needed.
Finishing Touches
Once assembled, you can personalize your truck bottle carrier. Sand any rough edges starting with medium grit and moving to fine. This smooths char marks and prepares the surface for finish. For a natural look, apply a clear coat like polyurethane or lacquer. For a vintage vibe, consider painting with acrylics in retro colors—red, cream, or matte black. Paint before assembly if you want crisp color separation between parts. Stencils or masking tape can help with two-tone designs. Add decals or vinyl lettering for a custom touch. If the carrier will hold real bottles, line the compartments with felt or a thin cork sheet to protect both the bottles and the wood. Felt pads on the bottom prevent scratching tabletops. The carrier can also be used purely as a decorative centerpiece or a unique gift box for a wine enthusiast. Let your creativity go beyond the digital file.
Final Thoughts
Planning a laser-cut project like a wooden truck bottle carrier is about more than just hitting ‘print.’ By understanding the design, choosing the right material, preparing your cutter, and planning assembly, you set yourself up for success. Each project teaches you something new—about your machine, about wood behavior, and about your own patience. Document your settings and any modifications for future reference. As you gain experience, you’ll develop a workflow that minimizes waste and maximizes enjoyment. Remember that even a failed cut is a learning opportunity. If you’re looking for a ready-to-cut design, the LaserNest Wooden Truck Bottle Carrier is available in SVG, DXF, AI, EPS, and PDF formats. It is designed for six bottles and features a vintage truck style. Always test your settings on scrap material and approach each step with care. Happy making!