How to Plan a Layered Dog Key Holder for Laser Cutting
Learn how to plan a layered dog key holder laser project, from material selection to assembly prep, for a functional and decorative home organizer.
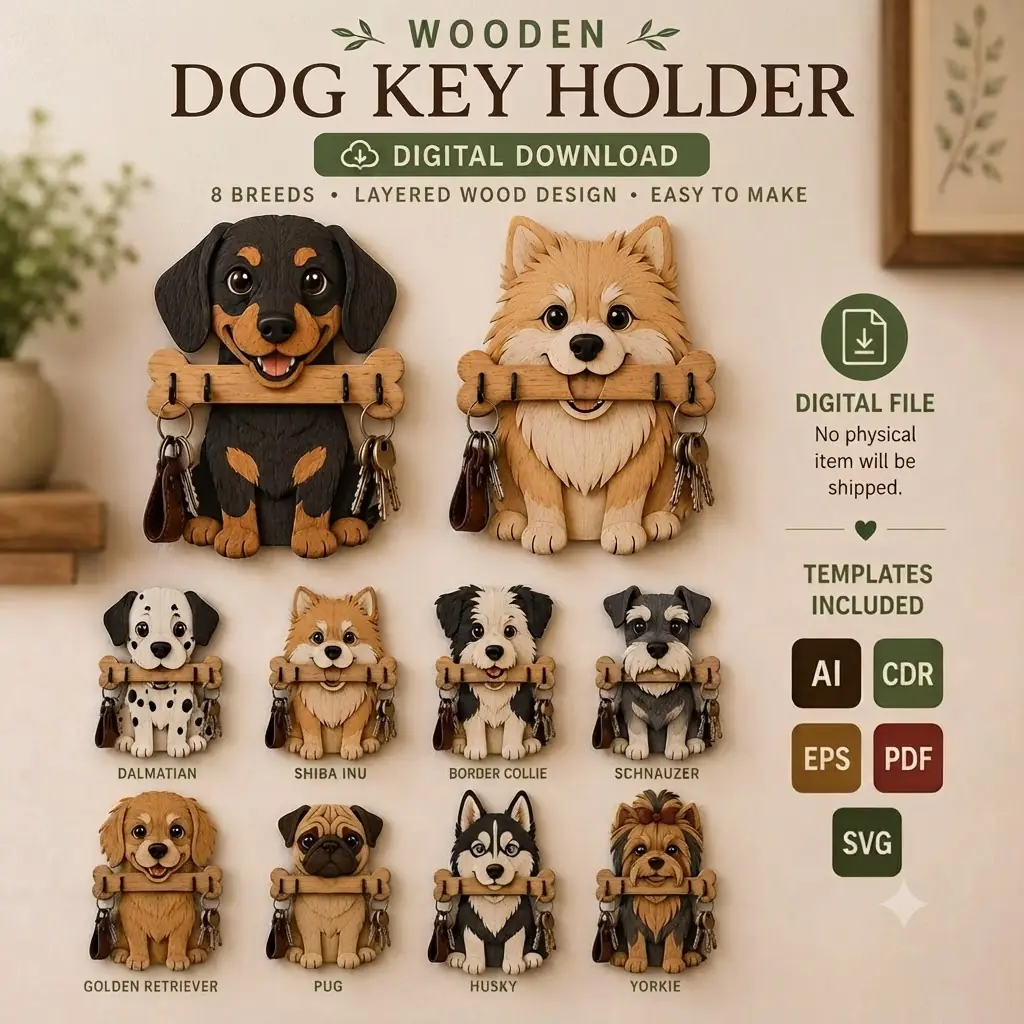
A layered dog key holder blends daily utility with personalized charm, turning a blank wall into an organized statement piece. Whether you craft it for your own entryway or as a thoughtful gift for a dog-loving friend, thoughtful planning is the secret to a seamless laser-cutting experience. This guide walks through every stage—from evaluating the layered design and selecting materials to preparing files and assembling a durable, attractive organizer.
Understanding the Layered Design
Most layered key holders stack multiple individually cut wooden panels to create depth and detail. Examine your design file carefully before cutting. Typically, a sturdy back layer anchors the piece, while middle and front layers add dimensionality—a dog’s ears, snout, collar, or a playful bone motif. Some versions include integrated slots or hook plates for keys and leashes.
Identify how many layers your chosen design uses and whether alignment aids like registration marks or interlocking tabs are included. If the design features text, such as a dog’s name, confirm that the font scales clearly at the intended size. Also check for fine details that may be too fragile at smaller scales. Adjustments during planning prevent material waste and frustration later.
Choosing Materials and Thickness
Baltic birch plywood is a popular choice for its fine grain, strength, and smooth surface. MDF offers uniformity but may produce more dust and require careful sealing, while hardwoods like maple or walnut veneer add a premium look but demand precise power and speed settings. Match the material to the intended finish: if you plan to paint, a smooth sheet of plywood or MDF works well; for a natural wood look, select a sheet with appealing grain.
Layer thickness dramatically influences the final piece. A thicker base (often around 1/8 to 1/4 inch) provides structural integrity for wall mounting, while thinner top layers keep intricate features crisp without adding excess weight. If the key holder will hold multiple leashes or heavy key rings, ensure the back layer is robust enough to support the hardware. Always test cut a small square of your chosen material to dial in laser settings and verify clean edges with minimal charring.
Preparing Your Workspace and Files
Start by downloading the digital design. All CNC-ready formats—SVG, DXF, CDR, and PDF—are provided, so you can work with your preferred software. Import the file and immediately check that all vectors are closed and joined. Open paths can cause the laser to behave unpredictably or skip critical cuts.
Many layered designs organize each tier in separate layers or color groups within the file. If not, isolate the layers manually, renaming them clearly (e.g., “Base,” “Mid-1,” “Top-Details”) to avoid mix-ups during assembly. Scale the design to fit your wall space, keeping in mind that smaller versions may lose detail and larger ones may exceed your laser bed dimensions. Apply kerf compensation if your software supports it, especially if pieces press-fit together. A small test cut of a few key interlocking elements quickly reveals whether adjustments are needed before committing to the full sheet.
Organize your physical workspace for efficient production. Pre-cut material blanks to match the laser bed, have masking tape handy for delicate areas, and ensure proper ventilation. If you are using a honeycomb or pin bed, confirm that small cutouts won’t fall through during cutting. Setting up a staging area for freshly cut layers prevents them from being misplaced or damaged.
Mastering the Assembly and Finish
Post-cutting, dry-fit all layers without adhesive. This step confirms alignment and reveals any burrs or mis-cuts. Lightly sand edges with fine-grit sandpaper to remove the characteristic laser scorch and create a smooth tactile feel. If you plan to stain or paint, now is the time to apply it to individual layers—this avoids color bleeding onto adjacent surfaces and makes reaching tight corners easier.
For a durable bond, choose a wood glue or CA (cyanoacrylate) adhesive suitable for porous surfaces. Apply a thin, even layer to prevent squeeze-out that mars the visible front. Use binder clips, light clamps, or a heavy book to press layers together while the glue cures. Some makers prefer to glue only a few layers at a time, allowing each bond to set before adding the next, reducing the risk of shifting.
Once the stack is solid, attach the chosen hardware. Key hooks come in various styles—single prong, double prong, or decorative shapes. Pre-drill pilot holes if your wood is prone to splitting, then screw in hooks by hand for control. Add a sawtooth hanger or keyhole slot to the back for wall mounting. Finish with a clear polyurethane or wax coat to protect against daily handling and humidity in an entryway.
Personalization and Creative Variations
One advantage of a layered dog key holder is the ease of customization. While the base design captures a generic dog silhouette, you can modify it to match a specific breed. Many designers leave the ears, muzzle, or tail as standalone layers, allowing you to swap shapes. If you have vector editing skills, importing a photograph to trace unique contours creates a one-of-a-kind tribute.
Incorporate a name badge or an engraved collar tag for extra sentiment. Adjust the layout to fit a narrow wall or combine the key holder with a small shelf for mail. When gifting, match the wood stain or paint color to the recipient’s interiors—espresso for modern spaces, whitewash for coastal homes. Always prototype any customization on scrap material to ensure it retains structural integrity and visual appeal before running the final job.
Project Planning Timeline and Tips
A little scheduling goes a long way. Break the project into meaningful sessions: file prep and test cuts on day one, material preparation and cutting on day two, and assembly plus finishing on day three. This spaced approach lets glue fully cure between layers and gives you fresh eyes to catch alignment issues.
Document your settings—speed, power, frequency—along with material brand and thickness. These notes become a valuable reference for future projects and help troubleshoot if something goes wrong. Keep a small off-cut from each batch for future test runs, because even the same material type can vary between suppliers.
Finally, embrace the learning curve. Even a well-planned project can yield surprises, but each one teaches you more about your machine’s behavior and your design sensibilities. By investing time in planning, you transform a simple key holder into a durable, meaningful piece that celebrates your love for dogs and craftsmanship every time you reach for your keys.