How to Plan a Layered Pet Key Holder for Laser Cutting
Learn how to evaluate and prepare a layered laser-cut key holder project, from material selection to assembly planning, for clean results.
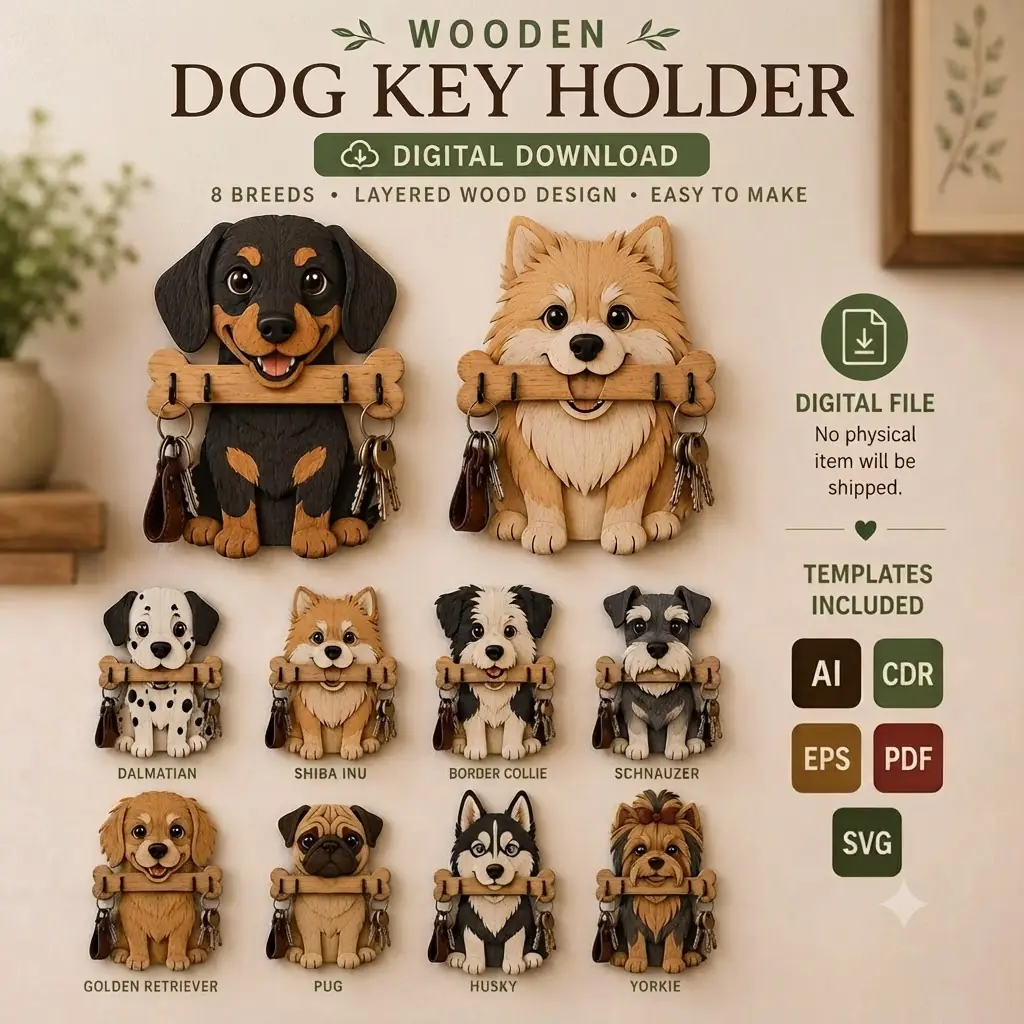
Planning a layered laser-cut project like a pet-themed key holder involves more than just downloading a file and pressing start. Whether you’re making one for your own entryway or as a gift for a fellow pet owner, a little upfront preparation can save material, reduce frustration, and give you a polished final piece. This article walks through the key considerations for a layered pet key holder project, using a typical 3D dog key holder bundle as an example.
Understanding the Layer Structure
Most layered key holders are built from multiple flat pieces that stack to create depth and dimension. A typical design might include a backplate, several middle layers that form the animal’s face or body, and a front layer with details like eyes, nose, or collar. Each layer is cut separately and then glued together, so it’s essential to understand the part hierarchy before you power on the laser.
Open the design files (commonly provided in SVG, DXF, CDR, or PDF formats) and examine the layer arrangement. Look for:
- Which pieces are meant to be the base or back layer. Often these have mounting holes for wall anchors or key hooks.
- Which pieces stack on top and in what order. Some designs use registration marks or subtle alignment aids; note these carefully.
- Any small detail pieces that might be delicate or require careful handling, like tiny eyes or whiskers.
If the bundle includes multiple dog breeds, decide which one you want to build first. Lay the cut-file previews side by side to compare complexity. Some designs may have more pieces or finer details, which could affect material choice or cutting time.
Choosing Your Material
Material choice affects both the look and the assembly process. For a sturdy key holder that will hang on a wall and hold keys or leashes, wood plywood is a reliable option. Common choices include birch, poplar, or maple plywood. Each species brings a different grain pattern and tone, so consider how the final piece will be finished.
Thickness is a key decision point. Since the bundle doesn’t prescribe a specific thickness, you’ll need to evaluate your own laser’s cutting capability and the desired finished effect. Thinner sheets yield more delicate, lightweight layers, while thicker material gives the piece a heavier, more substantial feel. Use the kerf calibration of your laser to ensure that slots and tabs (if present) fit snugly.
If you plan to paint or stain the piece, choose a material that accepts finish well. Plywood with a thin, smooth face veneer tends to paint more cleanly than rough-sanded lumber, while MDF can be painted but may soak up more paint and generate fine dust during cutting.
An acrylic build is possible, but it requires different adhesives and may scratch more easily. For a project that expects daily handling, wood remains the safer and more forgiving choice.
Pre-Cut Checklist
Once you have your material and design files, follow these steps before cutting:
- Confirm file compatibility. Make sure your laser software (LightBurn, Glowforge, etc.) can open the provided format. SVG is widely supported; DXF and CDR may need conversion, and PDFs must be vector-based.
- Review layer colors and power settings. Many design files use different colors to indicate cut vs. engrave, or to separate layers. Double-check that your software interprets these correctly and assign appropriate speed/power for your machine.
- Perform a material test. Cut a small test piece of one layer to verify that the kerf doesn’t cause parts to be too tight or too loose. Adjust your offset compensation if necessary.
- Plan the order of assembly. Lay out all cut pieces on a clean surface and dry-fit them before applying glue. This helps you spot any gaps, warping, or misalignment and ensures you know which piece goes where.
Taking these extra minutes can prevent wasted material and a disappointing final result.
Adding Your Own Touch
While the design bundle gives you a head start, small customizations can make the key holder truly one-of-a-kind. Consider:
- Paint or stain per layer: Painting individual layers before assembly lets you achieve crisp color separation. Mask off areas you want to keep natural, or use painter’s tape to create sharp lines.
- Engraved personalization: If the file license permits modifications, you could add a pet’s name or a short message using your laser’s engrave function. Place text on a flat, visible area where it won’t interfere with layer stack.
- Hardware upgrades: Swap standard key hooks for decorative cup hooks, leather strap hooks, or even small coat hooks to match your home’s decor style.
- Mixed materials: Combine wood backplates with thin acrylic accents for a modern look—just test adhesive compatibility first.
These tweaks don’t require advanced CAD skills and can elevate a simple cut-out into a thoughtful gift.
Assembly and Finishing Tips
After cutting, you’ll need to glue the layers together. Use a wood glue that dries clear and has a bit of open time so you can adjust alignment. Apply glue sparingly to avoid squeeze-out that could mar the surface. Clamps, spring clamps, or even heavy books help keep layers flat while drying.
If you choose to finish the piece, a clear spray lacquer or wipe-on polyurethane can protect the wood and deepen its color. Apply after assembly to seal all edges, or before assembly for tricky-to-reach spots.
Finally, attach the key hooks. The design likely includes predrilled holes or slots for hooks. Choose hooks that match the scale of the piece. Drill pilot holes if needed to prevent splitting, then screw hooks in firmly. Test with a set of keys to ensure the holder feels secure on the wall.
Conclusion
A layered pet key holder is a rewarding project that combines laser cutting with simple woodworking. By taking time to understand the layer structure, choose appropriate material, and plan your assembly, you’ll create a functional and charming piece that any pet owner would love. Whether you use a ready-made design bundle or create your own, the planning phase sets you up for success.