How to Plan a Laser-Cut Wooden Vintage Truck Bottle Carrier
Learn how to evaluate and prepare a six-bottle vintage truck carrier laser project before cutting, from material choice to assembly planning.
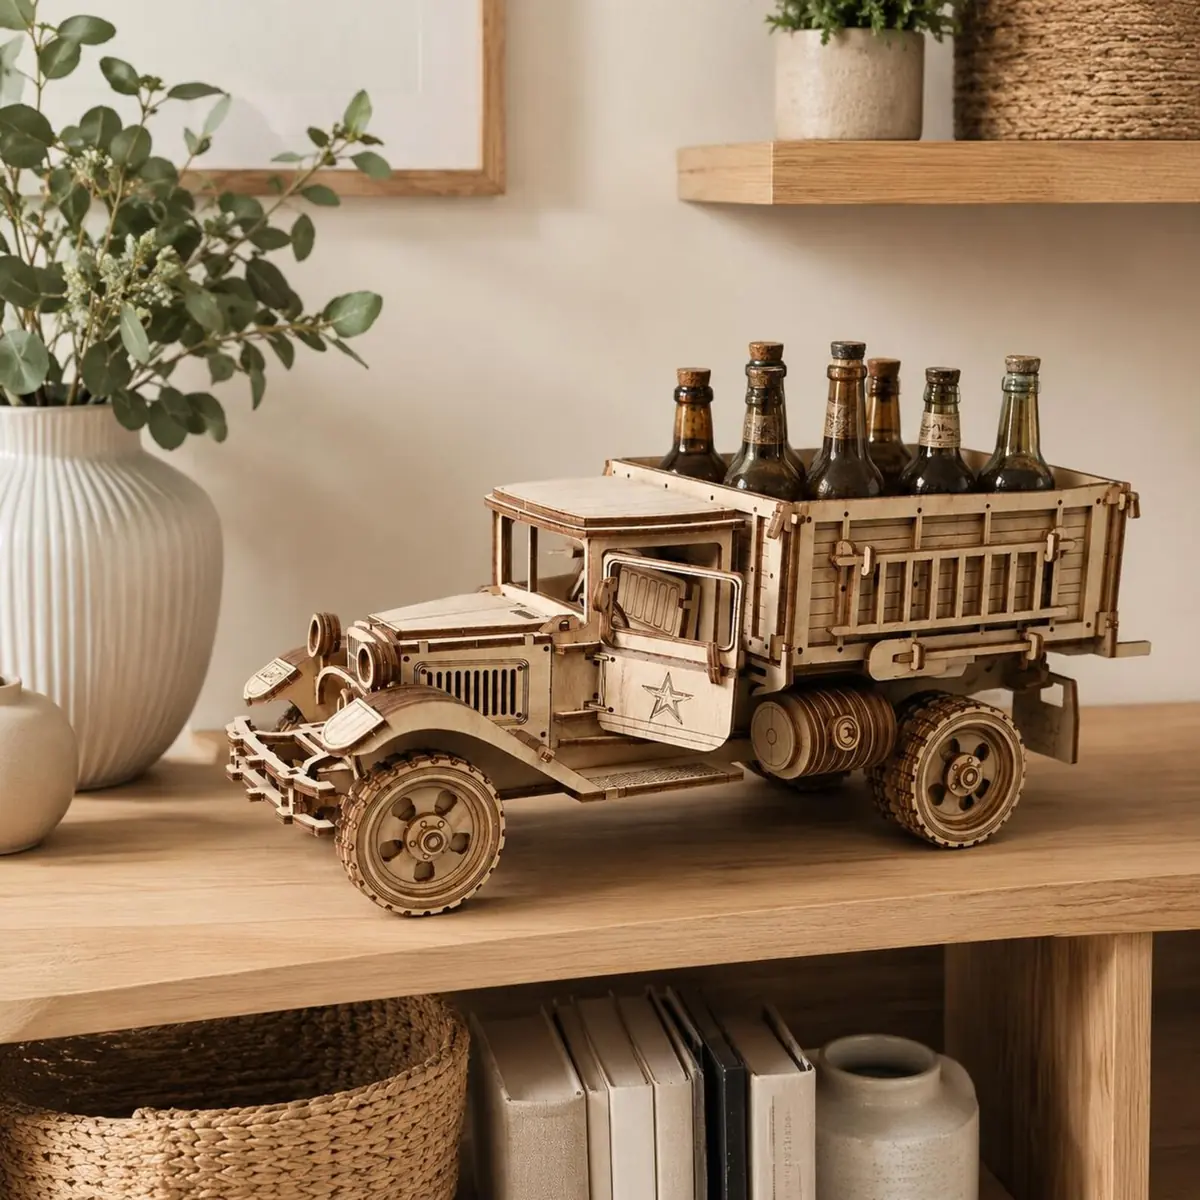
Planning a laser-cut project before you open the design file can save time, material, and frustration. This is especially true for multi-part 3D models like a wooden vintage truck bottle carrier. Whether you are new to laser cutting or have some experience, taking a few minutes to evaluate the design, choose materials, and plan assembly will help you get a clean, sturdy result.
Understanding the Project Scope
The wooden truck bottle carrier is a six-bottle carrier designed in a vintage truck style. It is a 3D model, meaning it has multiple interlocking parts that need to fit together precisely. Before you cut, look at the file formats available. The design comes in SVG, DXF, AI, EPS, and PDF. Choose the format that works best with your laser software. SVG and DXF are common choices for LightBurn and other laser control software. If you are using a Glowforge, SVG is often a straightforward option. The PDF can be useful for checking dimensions or printing a paper template.
Before committing material, verify the overall dimensions of the finished carrier. Measure the bed of your laser cutter to ensure all parts will fit in a single session or plan how you will rotate larger sheets if your machine supports a pass‑through. Also check the size of the bottle slots against your intended bottles. Wine bottles come in different diameters; knowing your bottle dimensions ahead of time lets you scale the design accurately or make minor adjustments without wasting material.
Selecting the Right Material
For a sturdy bottle carrier, you want a material that is thick enough to hold weight but not so thick that the slots don’t fit. Plywood, such as Baltic birch, is a popular choice because of its consistent thickness, fine surface, and strength. Common sheet thicknesses for laser projects range widely, so select one that balances structural integrity with the fit of the interlocking slots. Thinner material may not support six full bottles, while overly thick material can make the slots too tight and cause splitting during assembly. Always test a small piece first to verify the fit and strength.
MDF is another option, though it tends to create more dust and has less structural edge strength. Acrylic can work if you want a glossier, colorful carrier, but it requires different power and speed settings and can be more brittle under load. Wood is a great option for this project because it combines a warm look with reliable load‑bearing ability. When selecting your sheets, look for flat, unwarped panels. Store them flat in a dry environment for several days before cutting to minimize warping after the parts are cut.
Preparing Your Digital Workspace
Open the file in your design software and inspect each layer. Look for any small parts that might be lost or burn away. Check that all vectors are closed and there are no overlapping lines. Some files come with multiple layers for different colors or cut orders. Identify which layer contains scoring or engraving—the truck carrier likely has engraved details like windows, grille lines, or logos—and which layer defines the through‑cuts. Set your power and speed accordingly so the engraved features are crisp without cutting all the way through.
A key concept in laser cutting is kerf—the width of material removed by the laser beam. Your test cut should measure the thickness of the cut line and compare it to the slot width. If the parts fit too loosely, reduce the slot size slightly in your design software; if they are too tight, enlarge the slots. Many lighting systems have a kerf compensation setting that automates this, but planning for a test cut on scrap material of the same type and thickness is the best way to dial in a perfect fit before you cut the entire model.
Layout the parts efficiently on your sheet. Nest pieces close together to minimize waste, but leave enough room so the laser heat does not warp adjacent cuts. If the project includes many small connectors, consider grouping them in one area and testing the kerf on those specifically before cutting the larger body panels.
Planning the Assembly Process
A 3D model like this requires careful assembly. Study the parts layout to understand how they fit together. The truck body, wheels, fenders, and bottle holders will likely slot together. Dry fit everything without glue first. This reveals any tight joints that need sanding or loose ones that might need a shim. It also helps you learn the correct order of assembly, because some parts might have to be inserted before others.
When you are ready to glue, use wood glue and apply it sparingly with a small brush or toothpick to the interior of the slots—avoid getting glue on visible surfaces. Clamps, rubber bands, or even blue painter’s tape can hold the assembly while the glue sets. For a large model like this carrier, assemble in stages. For example, build the bottle cradle separately, then attach it to the truck bed, and finally add the wheels and cab roof. Letting each section dry thoroughly before moving on reduces the chance of misalignment.
If you plan to paint or stain the carrier, decide whether to apply the finish before or after assembly. Pre‑finishing parts can be easier to reach but may interfere with glue adhesion. Post‑assembly finishing gives a unified look but requires more patience to get into tight joints.
Tips for a Smooth Project
- Use a test cut on scrap material to check fit and engraving quality. Keep a log of the settings that worked so you can reuse them for future projects.
- Apply masking tape to the wood surface before cutting to reduce scorch marks. Peel it off carefully after cutting.
- Keep your laser lens and mirrors clean. A dirty lens causes uneven cutting and may require higher power, increasing the risk of charring.
- If your laser cutter has limited bed size, break the project into sessions by cutting the largest parts first. Just be sure to protect cut parts from moisture and warping while they wait.
- When scaling the design, always scale uniformly. Even a 1% mismatch between length and width can make slots oval and ruin the fit.
- Consider adding small chamfers or sanding the edges after cutting to give the carrier a more polished, tactile finish.
Conclusion
Planning a laser-cut vintage truck bottle carrier is straightforward if you take it step by step. Understand the design, choose the right material, prepare your files with kerf and layout in mind, and plan a logical assembly sequence. With a little preparation, you will end up with a beautiful, functional piece that makes a great gift or decor item. The time you invest before hitting “start” pays off in a smooth build and a carrier ready to showcase six bottles in classic style.